french macarons

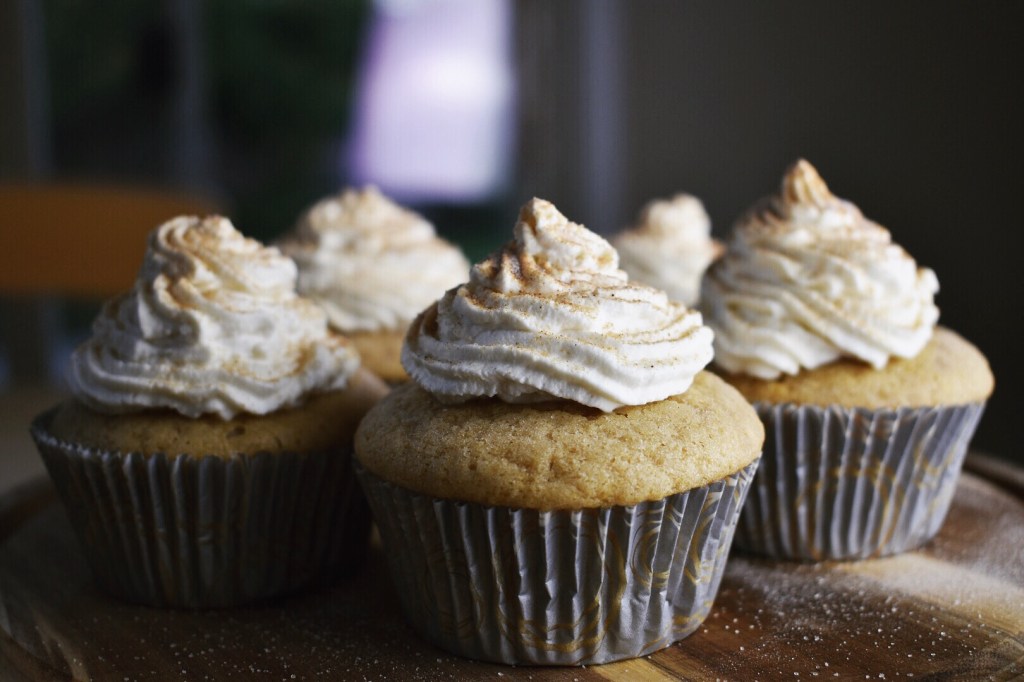
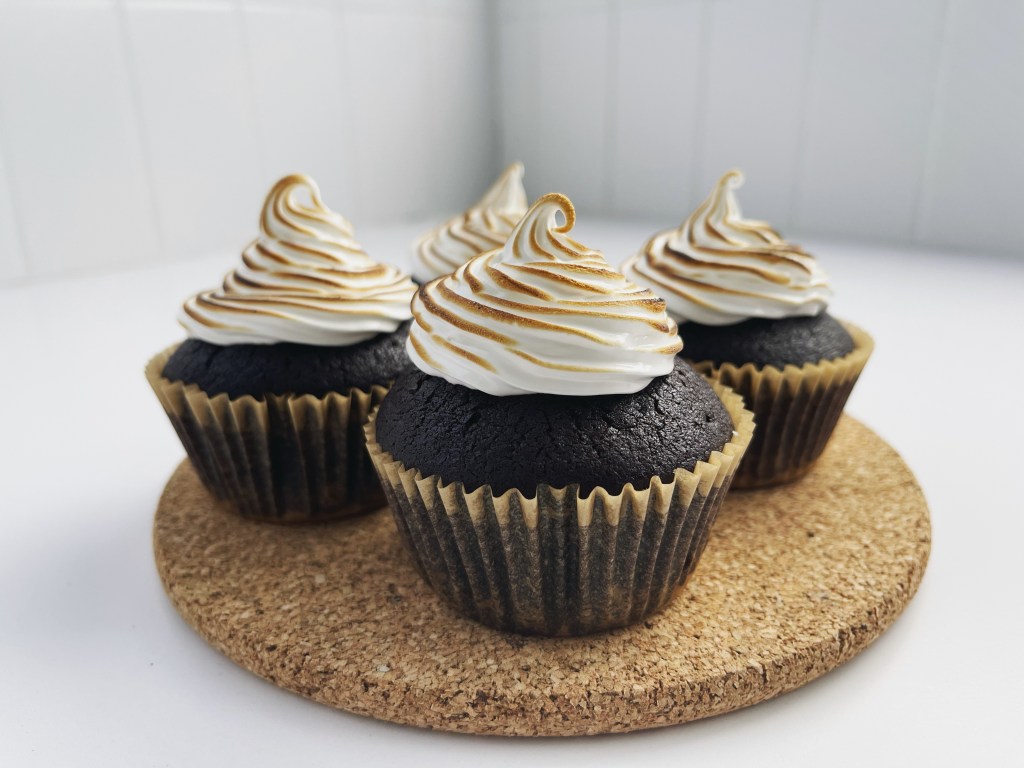
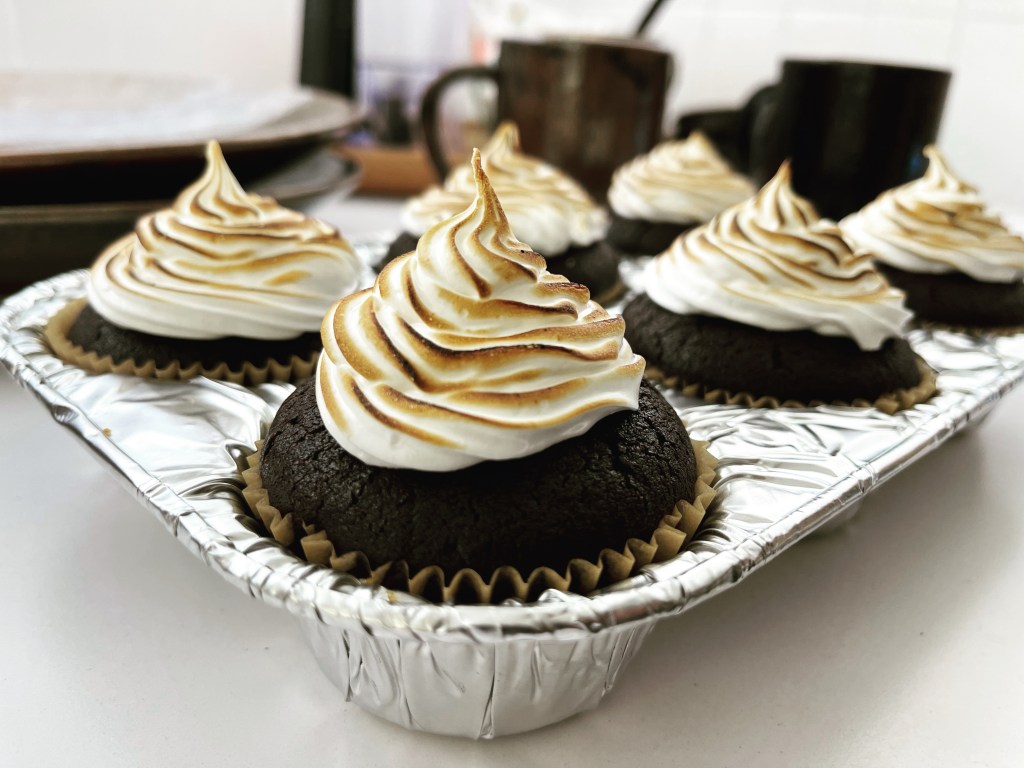
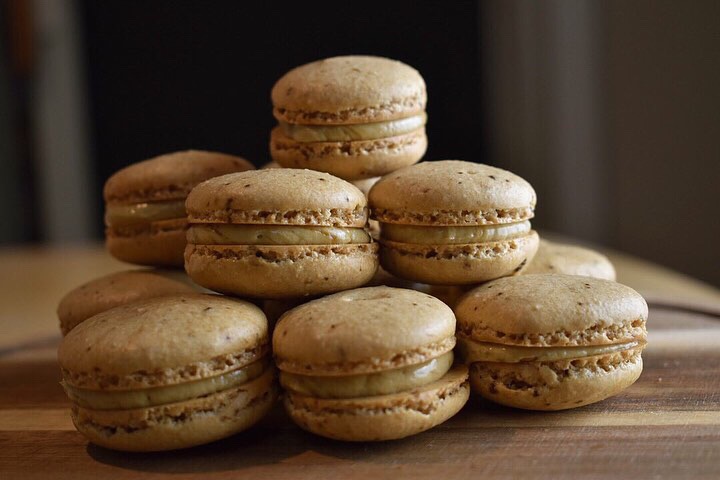
I’ve recently started trying to bake macarons! After 10 or so attempts I think I’m (kind of) starting to get the hang of it. I’ve been experimenting with flavors, and so far I’ve made coffee, green tea, chai, chocolate, and lemon. They’ve been a great hit with the people I’ve been working with in OB/GYN (which has been an amazing experience so far).

I used this recipe from the preppy kitchen, but I did make some minor changes as below. Be sure to read their post for excellent tips and tricks on getting the mixture just right!

To play with flavors, I usually just add a tablespoonful of Trader Joe’s instant chai, green tea, or coffee powder to the dry ingredients, then add another tablespoon or two to the sugar and water while making the buttercream. For the lemon, I added zest to the dry ingredients, then added zest and substituted lemon juice for the water in the buttercream.

French Macaron Ingredients:

  • 100 g egg whites (age by leaving them in a covered container in the fridge for a couple of days for best results)
  • a pinch of cream of tartar
  • 1/2 teaspoon vanilla extract
  • 90 g granulated sugar
  • 140 g almond flour, finely ground
  • 130 g confectioners sugar

French Buttercream Ingredients:

  • 1 stick of butter, softened
  • 1/4 cup granulated sugar
  • 3 egg yolks
  • 1 tbsp water

Instructions

  1. Whip the egg whites until frothy, then add cream of tartar.
  2. Continue to whip until fine bubbles begin to form, then slowly add the granulated sugar. Add the vanilla.
  3. Continue to whip until the mixture forms firm peaks. Be careful not to overwhip.
  4. Whisk together the almond flour and confectioner’s sugar in a separate bowl to get rid of clumps.
  5. Add the dry ingredients to the meringue.
  6. Fold the dry ingredients to the meringue, making sure to press the batter to the side of the bowl.
  7. Do not overmix. You will be able to tell when the mixture is done by checking if the batter forms a figure 8 without breaking.
  8. Add about half the mixture to a pastry bag with a wide round tip.
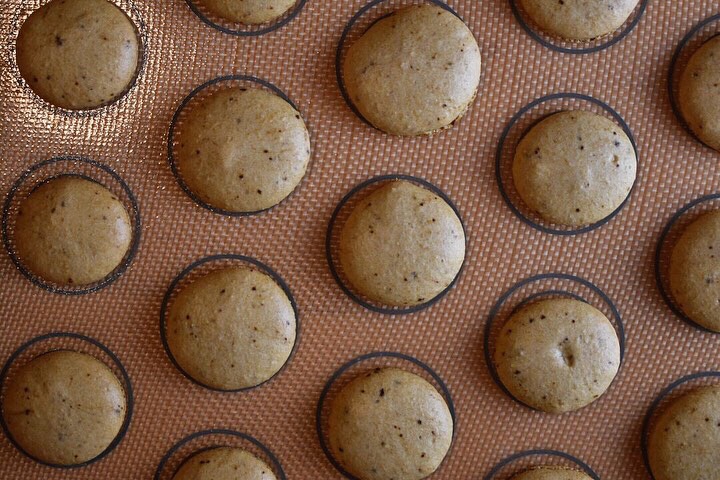
  9. Pipe the batter onto a tray lined with either parchment paper or a silicone mat (I’ve only ever used the silicone mats from amazon prime.) In total, I find that the total mixture usually will make 2 trays worth of macarons.
  10. Repeat with the remaining amount of batter. The reason I usually separate the batter into two “batches” for piping is that I think squeezing it in the bag releases too much of the air from the mixture, causing cracks.
  11. Tap the tray on the counter hard a few times to remove any air bubbles.
  12. Allow the macarons to sit on the counter for 30-40 minutes, until no batter sticks to your finger when you gently touch the top.
  13. Bake at 320 F for 12-13 minutes.
  14. While this is baking, make the french buttercream.
  15. Use a stand mixer to whip the egg yolks.
  16. Heat 1/4 cup of granulated sugar on the stovetop on med-high heat with the 1 tbsp of water, stirring constantly. Wait until all the sugar is dissolved and the mixture is bubbling.
  17. Add the sugar mixture to the egg yolks and whip until the bowl is cool to the touch.
  18. Use a butter knife to slowly add the butter to the bowl, use a low speed on the mixture.
  19. Whip until the butter is well incorporated.
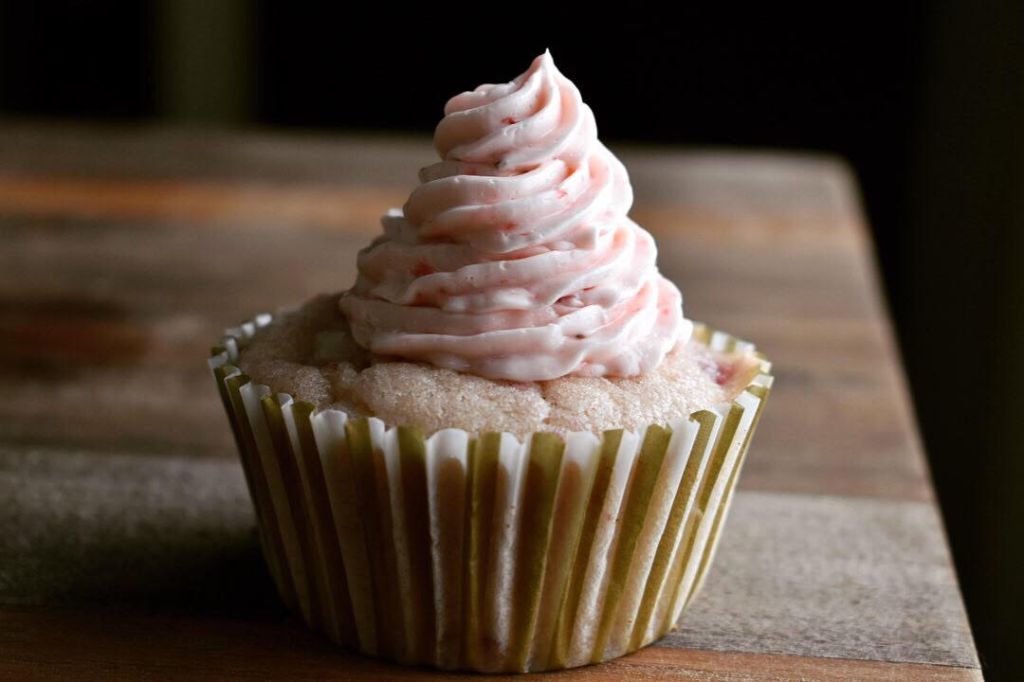
  20. Wait until the macaron shells are cooled, then fill and enjoy! They are usually best after chilling in the fridge for a day or two.

strawberry champagne cupcakes

Took my family medicine shelf exam today, so to de-stress I whipped up a batch of cupcakes. I used the recipe from familytabletreasures.com.

Strawberry Champagne Cupcakes from www.familytabletreasures.com

Cupcake Ingredients

  • 2 cups sugar
  • 2 sticks unsalted butter, room temp
  • 6 egg whites
  • 3 cups flour
  • 3 tsp baking powder
  • 1/2 tsp salt
  • 1 cup of pureed fresh strawberries
  • 1 cup champagne

Champagne Buttercream

  • 2 sticks unsalted butter, room temp
  • 1 lb confectioner’s sugar
  • 3 tbsp champagne
  • 3 tbsp pureed strawberries (be sure to squeeze out excess juice or this will make the texture REALLY weird)

Instructions

  1. Preheat oven to 350 degrees and line a cupcake tray with cupcake liners.
  2. Use a stand mixer to beat room temp butter and sugar together. Beat until fluffy.
  3. While the stand mixer is running, measure all dry ingredients into a separate bowl and set aside.
  4. Measure out champagne and strawberries and combine in another bowl.
  5. By now, the butter and sugar mixture should be well incorporated. Add the egg whites to the stand mixer bowl and beat until fluffy.
  6. Gradually add in about half of the dry ingredients to the stand mixer bowl. Continue to mix until incorporated.
  7. Add in half the strawberry/champagne mixture and beat until incorporated.
  8. Add in the remaining dry ingredients, followed by the rest of the champagne/strawberry mixture.
  9. Fill cupcake liners 3/4 of the way with the batter. Bake for 18 minutes, or until the centers are firm. Depending on how much batter you end up with, you might need to do a couple of batches.
  10. For the buttercream, I just threw everything into the stand mixer and beat until it was fluffy.
  11. Ice the cupcakes once they have cooled and enjoy!

green tea cupcakes & whipped cream

A friend of mine suggested I make matcha cupcakes, so I’m celebrating the start of the weekend by whipping up a batch! I used the recipe from here.

Green Tea Cupcakes with Whipped Cream from wildwildwhisk.com:

Cupcake ingredients:

  • 1 1/4 cups flour
  • 1/4 tsp salt
  • 1/2 tsp baking soda
  • 1 tsp baking powder
  • 3/4 cup sugar
  • 2 tbsp Matcha powder (I actually used TJ’s green tea latte powder)
  • 3/4 cup buttermilk
  • 1/2 cup vegetable oil
  • 1 egg
  • 1/2 tsp vanilla extract

Whipped cream ingredients:

  • 1 cup whipping cream
  • 1/2 tsp vanilla extract
  • 1/4 cup granulated sugar
  • 1 tsp Matcha powder

Instructions:

  1. Preheat oven to 350 F. Prep cupcake tray with cupcake liners.
  2. Mix dry ingredients for cupcake in a bowl and set aside.
  3. Gently whisk wet ingredients by hand in a larger bowl.
  4. Add the dry ingredients to the wet, whisking to make sure there are no lumps.
  5. Fill the cupcake liners and bake for 17-25 minutes, or until the centers are firm.
  6. While those are baking, make the whipped cream by adding all ingredients to a standing mixer bowl and whisking on a medium-high setting until firm peaks form.
  7. Cool cupcakes in the freezer until cold to touch, then ice and enjoy!

creme brulee

I went nuts and bought a tiny blowtorch to use for my s’mores cupcakes, and it just came in the mail today. I juuuuuust made those cupcakes for a labor day bbq, so I didn’t feel like whipping them up again just yet. Instead, I decided to make some creme brulee! I followed this recipe from the NYTimes. My fiance and I had a lot of fun with the blowtorch once these set in the fridge for a couple of hours. He loooooves creme brulee, so it was a challenge to keep him away long enough to snap these photos!

Ingredients

  • 2 cups heavy cream
  • pinch of salt
  • 1 tsp vanilla extract
  • 5 egg yolks
  • 1/2 cup sugar
  • more granulated sugar for the brulee bit

Equipment

  • cigar lighter
  • Four 6 inch ramekins
  • deep dish, oven safe containing boiling water

Instructions

  1. Set a pot of water to boil (approximately enough to fill half a deep dish; you’ll be filling it and putting the ramekins in it).
  2. Preheat the oven to 325 F.
  3. In a small pot, use a low setting to heat the cream and salt until hot. Do not let it boil.
  4. While the cream is heating, beat the egg yolks and sugar together until the sugar has dissolved and the mixture is light in color.
  5. Add in about 1/4 the cream mixture to the egg yolk/sugar mix and stir until combined.
  6. Add the yolk/sugar/creme mix back to the pot and stir to combine.
  7. Distribute evenly between the ramekins. Place the ramekins in the deep dish, and fill the dish about halfway with the boiling water.
  8. Bake for about 35-40 minutes.
  9. Allow the ramekins to chill in the fridge for a few hours.
  10. Sprinkle a thin layer of sugar on top of each creme brulee, and use the cigar lighter to melt the sugar just before serving.

tiramisu cupcakes

I’ve recently started watching “Chef’s Line” on Netflix. They did a great week on Vietnamese food the first season and I got totally hooked. Their Italian week inspired me to make tiramisu cupcakes! I used the recipe from here. I followed it almost to the letter since I’ve never made tiramisu before, but the creme texture turned out a little wonky since I used the stand mixer to add the mascarpone to the whipped cream — protip, don’t do that unless you want it to have a weirdly whipped texture. You can see that from the photo below.

Of course, I had to attempt the tiramisu cupcakes again (and give the office some nice little treats after the long weekend!) and I’ve got them looking much, much nicer. And I actually remembered to dust them with cocoa powder for the full tiramisu feel (and taste!)

Tiramisu Cupcakes: Recipe from prettysimplesweet.com/tiramisu-cupcakes/

Ingredients

Cupcakes:

  • 1⅓ cups (185 g/6.5 oz) all-purpose flour
  • 1 tsp baking powder
  • 1 tsp espresso powder or instant coffee powder
  • ¼ tsp salt
  • ½ cup (1 stick/115 g) butter, softened
  • ½ cup (100 g/3.5 oz) granulated sugar
  • ½ cup (100 g/3.5 oz) brown sugar (or granulated sugar)
  • 2 eggs, at room temperature
  • 1 tsp pure vanilla extract
  • ½ cup (120 ml) whole milk

Coffee Soaking Syrup:

  • ¼ cup hot water
  • 1 tsp espresso powder or instant coffee powder*
  • 3 tbsp sugar
  • 1 tbsp marsala or coffee liqueur such as Kahlua, optional but so good!

Frosting:

  • ¾ cup (170 g/6 oz) mascarpone cheese
  • ⅓ cup confectioner’s sugar, sifted
  • 1 tsp espresso powder or instant coffee powder*
  • 1½ tbsp coffee liqueur
  • ¾ cup (180 ml) heavy cream
  • Cocoa powder, for dusting

Instructions

Cupcakes

  1. Remove butter and mascarpone from fridge and allow to reach room temp.
  2. Preheat oven to 350 F. Line muffin tin with cupcake liners.
  3. Sift flour, baking powder, coffee/espresso powder, and salt into a large bowl. Set aside.
  4. Use a standing mixer with a paddle attachment to beat together butter and sugars on medium speed until fluffy, about 3 minutes.
  5. Add eggs one at a time, then vanilla extract.
  6. Reduce mixer speed to low.
  7. Add half of the dry ingredients and milk, then beat until incorporated.
  8. Add the other half of the dry ingredients and continue beating until combined. Do not over mix.
  9. Divide batter evenly between cups. Bake for 15-20 minutes.
  10. Remove cupcakes and allow to cool.

Coffee soaking syrup

  1. Make syrup by mixing the coffee/espresso powder and sugar in hot water.
  2. Poke the tops of the cupcakes with a fork. Spoon the coffee syrup over the tops. Use all the syrup evenly over cupcakes. Don’t be alarmed if it forms a small puddle, it will soak in.

Icing

  1. Whisk together mascarpone, sugar, espresso powder, and liqueur.
  2. Use a stand mixer to whisk heavy cream until stiff peaks form.
  3. Using a flexible spatula, add half the whipped cream to the mascarpone mixture.
  4. Gently mix, then add the remaining half of the whipped cream and mix until well combined.
  5. Use them to ice the cupcakes and lightly dust the tops with cocoa powder.

s’mores cupcakes

I’ve started my family medicine rotation a couple of weeks ago. It’s been a lot of fun! The docs, NP, PA, and MAs I work with have been super nice and awesome teachers. I’ve been learning a lot and getting a ton of great experience. To try and make myself useful since I’m literally just a sponge, I have been baking like crazy. I’ve baked chocolate cake, cookies, keto brownies (those were interesting) and blueberry muffins so far. And naturally, since clinic ended early today, I decided to make s’mores cupcakes! I’ve been experimenting with icing (my fiance has been bugging me to make buttercream, so I made chocolate cake with vanilla buttercream peonies), and I thought I’d give marshmallow icing a try.

Here’s the recipe I used from lifeloveandsugar.com. I modified it a tiny bit as follows to make 16 cupcakes.

Ingredients:

Graham cracker crust

  • 1 sleeve of graham crackers, crushed
  • 4 tbsp granulated sugar
  • 5 tbsp melted butter

Chocolate cupcakes

  • 1 cup all purpose flour
  • 1 cup granulated sugar
  • 6 tbsp cocoa powder
  • 1 tsp baking soda
  • 1/2 tsp salt
  • 1 egg
  • 1/2 cup buttermilk
  • 1/2 cup vegetable oil
  • 1 tsp vanilla extract
  • 1/2 cup boiling water

Marshmallow icing

  • 4 egg whites
  • 1 cup granulated sugar
  • 1 tsp vanilla
  • 1/2 tsp lemon juice (or cream of tartar if you have it)
  • optional semisweet chocolate bits (I got mine from Trader Joe’s, they’ve got a nice jagged edge)

Directions

  1. Preheat oven to 320 F. Set up cupcake tin with liners.
  2. Mix crushed graham crackers with butter and sugar until evenly coated.
  3. Add the mixture to cupcake liners, push down to compact.
  4. Bake for 7 minutes. Then remove and let cool. Turn the oven down to 300 F.
  5. While you’re waiting for the crusts to bake, make your cupcake batter by mixing the dry ingredients (flour, sugar, cocoa, baking soda, and salt) in a large bowl.
  6. Add wet ingredients (vegetable oil, buttermilk, vanilla extract) and stir to combine.
  7. Once you’ve got a thick batter, add the 1/2 cup boiling water and gently mix until everything is well incorporated. The mixture should be fairly runny, but don’t worry!
  8. Fill cupcake liners over halfway.
  9. Bake at 300 for 17-20 minutes, or until cooked through the center.
  10. Remove from oven and let cool. (I like to put mine in the freezer because I’m impatient.)
  11. While the cupcakes are baking, make your marshmallow icing! Combine egg whites, sugar, lemon juice, and vanilla in a heat proof bowl.
  12. Heat using a double boiler or a pot of boiling water, whisking constantly until all the sugar is dissolved.
  13. Here, the original directions say to use a thermometer and wait until it gets to 140 or 160 — I just waited until all the sugar was dissolved and there were some bubbles forming from my whisking.
  14. Remove from heat and use a stand mixer/hand mixer to whisk. Start at a low speed, and gradually increase to high speed. Whisk for about 7-10 minutes, or until the mixture forms stiff peaks.
  15. Ice your cooled cupcakes and enjoy!

white chocolate cranberry breakfast cookies

As a thank-you to the office I’m at for my pediatrics rotation, I decided to make some semi-healthy breakfast cookies! I modified this recipe by adding a handful of dried cranberries and white chocolate chips instead of nuts and doubled the recipe to make 25 cookies. Putting these together took about 30 minutes — really the most difficult part was mashing the bananas with a spoon and trying to keep them from escaping the bowl.

I used a mix of Irish oats and Quaker Oats brand of quick oats for a good variety of texture. (Last time I used oats in a recipe, I used just Irish oats and ended up with a much denser cake than I was expecting…)

The recipe with my modifications (makes about 25 cookies as written) from “from my bowl“:

White Chocolate Cranberry Breakfast Cookies

  • 2 ripe bananas
  • 2 cups Quaker Oats quick oats
  • 1 cup Irish oats
  • 2 tbsp applesauce
  • 2 tbsp honey
  • 2 tsp baking powder
  • 2 tsp cinnamon
  • 1 tsp salt
  • 1 large handful of dried cranberries
  • 1 large handful of white chocolate chips
  1. Preheat the oven to 350 F. Line a baking sheet with parchment paper.
  2. Mash bananas in a bowl until it forms a paste. Some chunks are fine.
  3. While you’re mashing the bananas, throw the 1 cup Irish oats into a blender and blend until it forms a fine powder.
  4. Add the Quaker oats, blended oats, applesauce, honey, baking powder, cinnamon, and salt to the bowl with the bananas. Mix well. The “batter” should be a somewhat dry consistency but sticking together well.
  5. Mix in the cranberries and white chocolate chips.
  6. Use about 3 tbsp of the batter to form each cookie. Note that they will not spread or change shape in the oven, so be sure to form them in the shape you want!
  7. Bake for 15 minutes.
  8. Flip the cookies over and bake for an additional 5 minutes.
  9. Cool and enjoy!
Design a site like this with WordPress.com
Get started